> For the complete documentation index, see [llms.txt](https://doc.dastra.eu/llms.txt). Markdown versions of documentation pages are available by appending `.md` to page URLs; this page is available as [Markdown](https://doc.dastra.eu/en/features/settings/single-sign-on-sso/adfs.md).
# ADFS
Dastra integrates with ADFS, and this page explains the specifics of configuring SSO with AD FS.
**What is ADFS?**
Active Directory Federation Services (commonly abbreviated as ADFS) are a single sign-on (SSO) solution designed by Microsoft. These services, a component of Windows Server operating systems, allow users to authenticate via Active Directory (AD) when they want to access an application that cannot use Integrated Windows Authentication (IWA).
**Configuration of ADFS in Dastra**
**Step 1: Create a SAML login in Dastra.**
* Go to the \[appropriate section]
* Click on "Add an SSO login"
* Select SAML as the "SSO Protocol" type
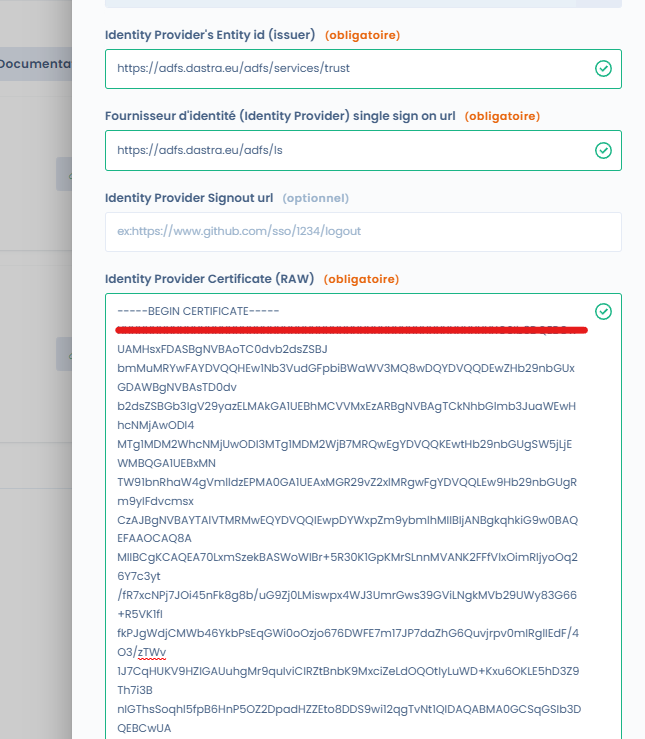
* In the "Identity Provider's Entity id (issuer)" field, enter the following URL:
* In the "Identity Provider single sign-on url" field, enter "/adfs/ls"
**Step 2: Retrieve the ADFS certificate**
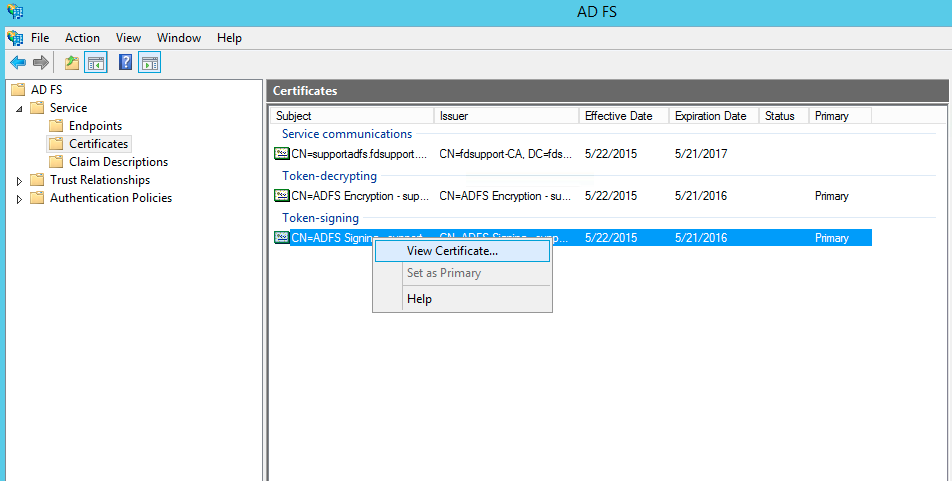
* Go to the "Certificates" directory of the ADFS server
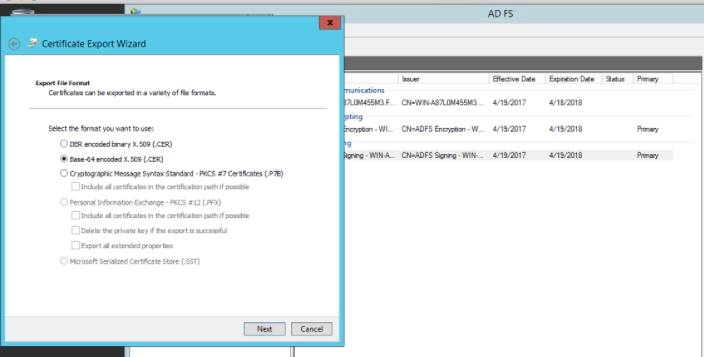
* Retrieve the .CER certificate of your ADFS server using the "Token-Signing" certificate.
* Click on "**View Certificates**".
Copy the X509 Certificate code by opening the CER file with a text editor. Insert the certificate code into the certificate field that starts with "----BEGIN CERTIFICATE-----" and ends with "----END CERTIFICATE-----". Your login configuration should look like this:
**Step 3:** Keep the following values:
* **SP redirect URI (format: ):** The SP redirect URI is the Application Callback URL (SAML Token will be posted here). The encoding supported are SHA-256 and higher.
* **Identity Provider's Entity id (issuer)**
These two values will be used to configure the ADFS server to accept SSO requests from Dastra.
**Configuration of Dastra Client in ADFS**
Here's how to configure Dastra SSO with ADFS SSO SAML2P:
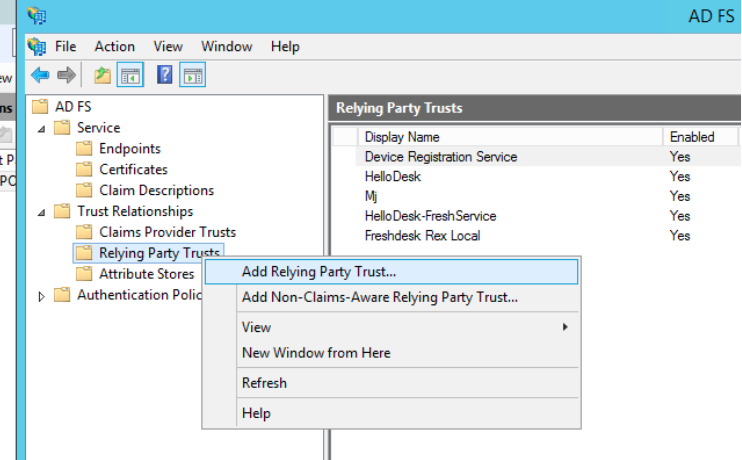
**Step 1:** On your ADFS server, open "AD FS Management"
**Step 2**: Right-click on "Relying Party Trusts" and select "Add Relying Party Trust". This will launch the Relying Party Trust addition wizard.
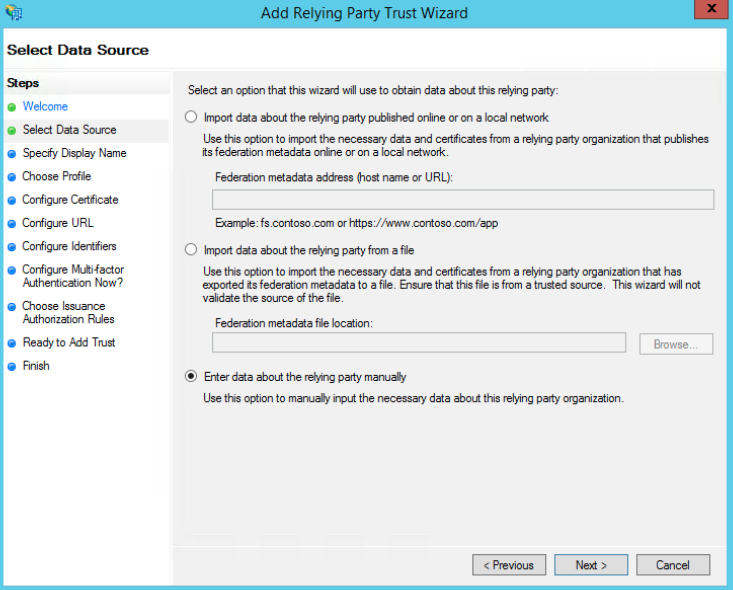
**Step 3:** In the Select Data Source screen, choose Enter data about the relying party manually.
**Step 4:** Enter a Display name, for example, "Dastra," and then click "Next".
**Step 5:** Choose AD FS profile with SAML 2.0 and click "Next".
**Step 6:** Click "Next" on the Configure Certificate screen without selecting a certificate.
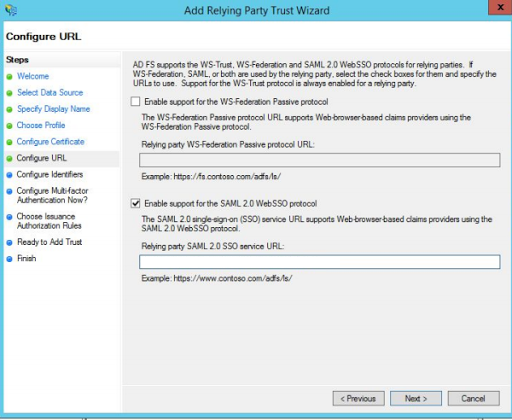
**Step 7:** Select "Enable support for the SAML 2.0 Web SSO protocol."
In the field "Relying party SAML 2.0 SSO service URL", enter the "SP redirect URI" URL from Dastra. This URL is in the form: Step 8: In the section "Add a Relying Party Trust Identifier", add two values: account.dastra.eu and [https://account.dastra.eu](https://account.dastra.eu/)
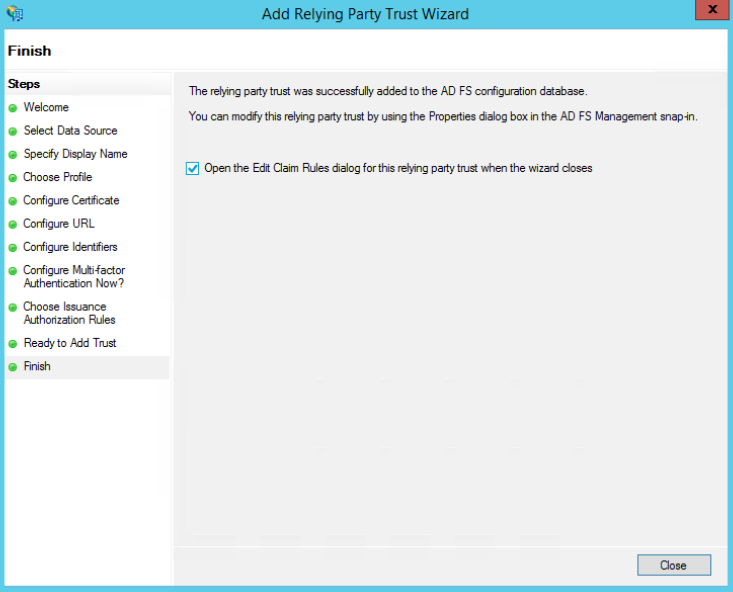
Step 9: Click next until the end of the process.
Step 10: Check the box Open the Edit Claim Rules dialog before clicking on "finish". An "Edit Claim Rules" window will then appear.
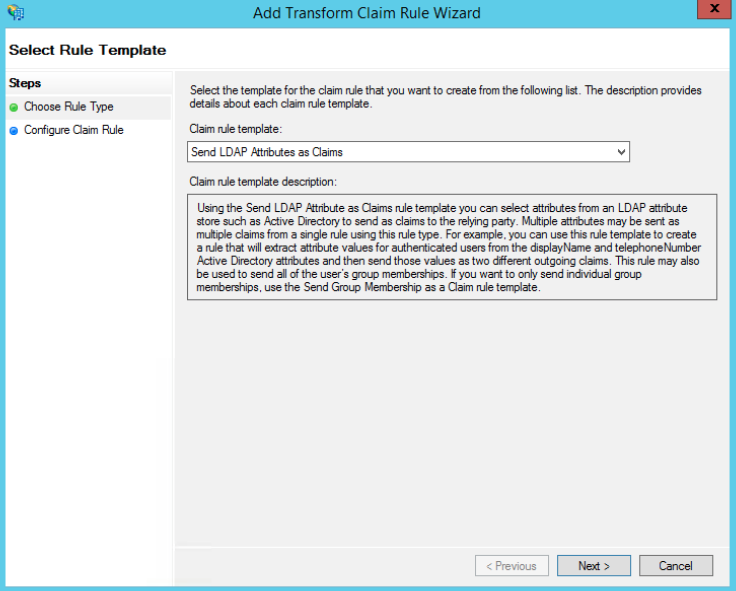
**Step 11:** Click on Add Rule and choose the "Claim Rule": "Send LDAP Attributes as Claims".
**Step 12:** Map the claims as follows, the names of the claims may vary depending on the configuration of your server. Dastra needs three attributes to function: Email (Mandatory), User's First and Last Name.
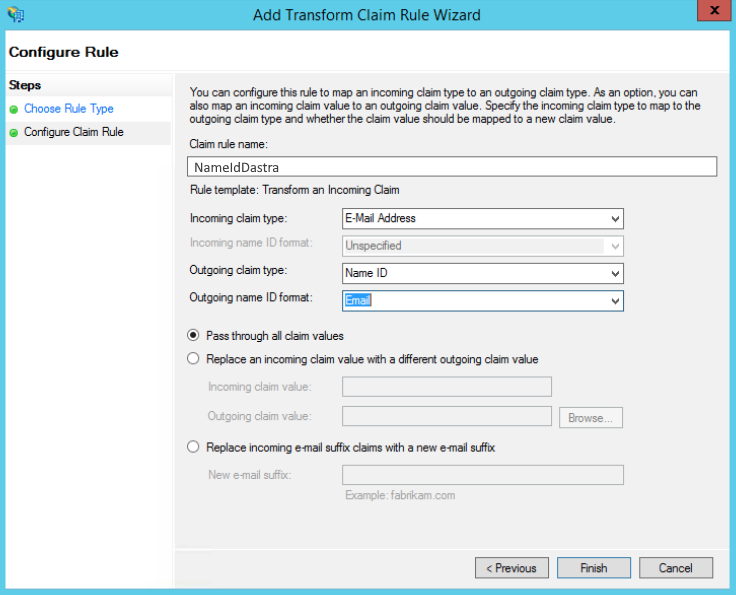
**Step 13:** Click on "Finish" and then click again on "Add Rule". This time, choose the type "Transform an Incoming Claim" and click next.
**Step 14:** Configure the following rule: Email Address => Name ID => Email
Then apply the changes by clicking on "Apply".
**Step 15:** Back in the "AD FS Management" window, right-click on "Relying Party for Dastra" and choose "properties". In the Advanced tab, choose SHA-256 as the secure algorithm.
**Step 16:** You have succeeded!
End and Tests!
Once everything is configured on both sides, you can return to Dastra and launch a test of SSO login directly in the manager.
---
# Agent Instructions
This documentation is published with GitBook. GitBook is the documentation platform designed so that both humans and AI agents can read, navigate, and reason over technical content effectively. Learn more at gitbook.com.
## Querying This Documentation
If you need additional information that is not directly available in this page, you can query the documentation dynamically by asking a question.
Perform an HTTP GET request on the current page URL with the `ask` query parameter, and the optional `goal` query parameter:
```
GET https://doc.dastra.eu/en/features/settings/single-sign-on-sso/adfs.md?ask=&goal=
```
`ask` is the immediate question: it should be specific, self-contained, and written in natural language.
`goal` is optional and describes the broader end goal you are ultimately trying to accomplish on behalf of the user. GitBook uses it to tailor the answer towards what is most useful for that goal.
The response will contain a direct answer to the question and relevant excerpts and sources from the documentation.
Use this mechanism when the answer is not explicitly present in the current page, you need clarification or additional context, or you want to retrieve related documentation sections.